Showing posts with label Recipes. Show all posts

Taco Night


If I had two million dollars (people always say a million so I decided to up the ante) I would throw dinner parties bi-weekly. I really would. Is that obnoxious? It  isn't meant to be...I mean, I would totally invite you...probably. Well, to at least one of the dinner parties. The point here is that cooking is fun, but cooking food for people you actually like rather than complete strangers (hello restaurant life) is damn lovely. 

See, I keep a list on my phone of food I want to cook and I'm happy to report that I am making progress! I already crossed off twix, and taco night was next.   Since I'm home for a bit and chillin' with my parents I decided to go for a produce packed version of the meal for friday night dinner, mostly because I went a little wild at the vegetable stand. It ended up being a night of many cultures, we sipped on champagne mixed with St. Germain and finished off the meal with a peach pie I made special for my pops (recipe to come). 


4 ears of corn, shucked
1 tbl canola oil
1 red pepper, roasted and peeled
1/2 Anaheim pepper, roasted and peeled
1/2 Serrano pepper
1/2 lime
1 tbl olive oil
1/4 cup crumbled cotija cheese (optional)
salt
  1. Heat a gas grill to medium-high. Brush the corn with the canola oil
  2. Grill the corn on all sides until charred in placed but not ashy and completely burned, about 10 minutes. Make sure to close the lid in between turning the corn
  3. Remove the corn from the grill and let cool
  4. Meanwhile remove the seeds from the peppers and roughly chop the red pepper and Anaheim pepper, combine in a large bowl. Finely mince the Serrano pepper and add to the bowl
  5. Once the corn has cooled stand it up in the large bowl and cut the kernels off the cob, slicing down each side right into the bowl
  6. Drizzle the mixture with the olive oil and squeeze the juice of the lime over top
  7. Mix it all together and generously season with salt. Taste, and then add more salt.
  8. Finally, top with the cotija cheese or mix it right in


Other topings for the tacos included:
  • Cilantro
  • Mashed Avocado with lime & salt
  • Pico de Gallo
  • Shaved Radishes
  • Cotija Cheese
  • Sour Cream
  • Lettuce
  • Roasted Annaheim Peppers
Some people hate cilantro. It baffles me. To each his own though, to each his own.


I really wanted to make grilled fish tacos, because...well, those are the best kind of tacos but we had fish the night prior so I grilled up some chicken breast and flank steak instead.

For the chicken, I pounded them out so they were thinner and even, then I marinated them with grated onion, a bit of olive oil, lime juice, paprika, cumin, just a smidge of cinnamon, a little brown sugar, cayenne pepper, and turmeric.  I didn't use very much of any spice, no more than 1/2 teaspoon...just enough to get some flavor in there. I used the same marinade for the flank steak and let it sit for about an hour before grilling.


Here are some other tips:
  • You can roast the peppers over a gas burner or a grill, after they are charred place them in a bowl and cover with plastic wrap. Let sit for 10 minutes, this will help the skin peel off easier.
  • Shave the radishes earlier (on a mandolin), and let them chill out in cold water before serving
  • Use corn tortillas and make sure they are warm. I heated mine up on the grill and kept them in a basket with a towel before serving. I also recommend buying the tortillas with the simplest, most obvious ingredient list, the taste is way better and so is the texture.

Happy Eating!

I'm off to San Francisco/Napa for a "why the hell not" trip. Let me know if you have any recommendations. Much appreciated!

Summer Salad


Yah, I said it. I said perfect. This combo is sort of a home run. No, it's totally a home run. I love this salad. It doesn't matter how hot it is outside or how many beaches you've been to because it's just not summer until watermelon gets involved.

In whatever amounts you'd like, you'll need:

watermelon
avocado
feta
radish (optional)
red onion, chopped or sliced
mint, sliced or torn
chives, chopped
salt & black pepper

* I listed the ingredients in order of amount used, starting with the most prominent ingredient

You just cut the first four ingredients into rough one inch cubes, assemble them in any rectangular pattern you enjoy, sprinkle the herbs and red onion on top and finish with salt and pepper. 


Gotta love a bunch of summery ingredients that don't require extra flavoring. It's definitely my favorite part of this season-all the super fresh fruits and veggies--kinda makes you want to grow your own food, doesn't it? Or maybe have a picnic? This could be a great (well recieved) picnic salad, just cut the avocado right before you eat it. wham bam delicious! And on the topic of gorgeous ingredients from the ground I leave you with these wise words from a very smart fellow:

"Eat food. Not too much. Mostly plants."
                  -Michael Pollen-

Scones & A Winner


Here's the deal, I made some scones. They're pretty good. I ate them with butter and rhubarb puree and I contemplated all the variations of scones that could be made. That happened. After I made those scones I hopped on a flight to Seattle and had a really hilarious weekend at home, a weekend I'm genuinely missing right now. 

Any weekend spent at your old summer camp with good company constantly referencing  the show GIRLS is a good weekend. 
That's a fact of life. 


Back to the scones though, I made them using spelt flour that I picked up from Wild Hive at the farmer's market. (sidenote on wild hive: best polenta on the earth. It's more polenta-ey than any other polenta, it's the corniest in the best way imaginable)

After a weekend at home I have to admit I'm sort of bummed to be back at school. Thankfully I have some scones left over to cheer me up.


1 large stalk of rhubarb (or two small)
2 tbl agave nectar (or 1/4 cup sugar)
pinch of salt
1 slice of ginger, finely chopped (optional)

  1. Chop the rhubarb into small pieces
  2. Combine with sugar and salt (and ginger) in a small nonstick pan and cook over medium heat, stirring with a wooden spoon or heat resistant spatula
  3. Remove from heat when it has melted together and looks like jam
  4. Add more sugar if you want it sweeter, I like it tart
  5. Blend in a blender until smooth

The rhubarb puree really is that easy, and I've eaten it on just about everything. If you don't want scones, at least make the rhubarb. I'm begging you a little.


1 cup All Purpose flour  (plus extra for kneading)
1 cup Spelt flour
1 tbl baking powder
1 tsp salt
1/2 cup agave nectar or 1/2 cup sugar
Zest of 1 lemon
1 egg
1/2 cup Chobani (plain greek yoghurt) (plus extra for brushing on top)
1 stick (1/2 cup) of butter, chopped and kept VERY cold
1/3 cup shredded coconut, I really love this brand
1 cup of chopped fresh strawberries

set oven to 400 F
  1. Combine the dry ingredients (flours, baking powder, salt) in a large bowl
  2. In a smaller bowl beat the egg, add the greek yoghurt, lemon zest and agave nectar and stir (if using sugar, add with the dry ingredients)
  3. Add the COLD butter to the flour and rub it in with hands until it makes pea sized butter clumps
  4. Add the strawberries and coconut to the flour and toss together gently
  5. Drizzle in the wet ingredients and mix until just combined and butter is still chunky
  6. Dump the dough blob onto a floured surface and knead gently until it is no longer falling apart Again, do not overwork, this should just take a couple turns. 
  7. Shape the dough into something resembling a circle and cut into wedges. You can cut them as large or small as you'd like just make sure to cook them for less time if they are very small
  8. Spread a light coat of Greek yoghurt on the top for color 
  9. Place on a parchment lined baking sheet and cook for 15-20 minutes, check ever 5-10 minutes
  10. Eat warm with butter and rhubarb puree!

Fear not, I did not forget! Thank you to everyone who entered the giveaway. 

The (randomly selected) winner is... Claire from Live and Love to Eat. Congratulations! Please email me your address and I will pass it on to Chobani. My email again is ilanafreddye [at] gmail [dot] com

Thanks again guys! 

Lemon Poppy Seed Shortbread


You know how teachers used to assign seats in class? And it was totally devastating if your friends were all on the other side of the room. Well, teachers don't assign seats anymore. Apparently we've matured past that. What I find hilarious every single time I enter one of my classes is that people assign themselves seats. I mean that, it makes me laugh every time. We find a seat, we call it home and then for the rest of the semester we become oddly loyal to this spot. We're nesting. Oh the comforts we find in ritual, the same seat, the same workouts, the same schedule. We are creatures of comfort.

Recently, I have found comfort in the process of baking, especially in the morning. There's something about  the peacefulness of morning and the calm I find in baking that just go so well together.  Oddly enough I have been craving everything and anything lemon poppyseed lately. Why so odd? Because just last week I was no fan of lemony things, no fan at all. And then suddenly, I'm back on the wagon. Lemon poppy seed please.  First recipe to get the lemon poppy seed treatment are these buttery shortbread cookies. 


Since I was passing these on, I wrapped them in some parchment paper and tied the ends with butcher's twine that I had in the room. I've been coveting the lovely string from this company and since the twine I used was wrapped around a box of pastries (cannolis mmmm) we got last weekend, I think I'm going to consider ordering some of my own.


1 cup (2 sticks) unsalted butter 
1/2 cup powdered sugar
1 tbl sugar
2 cups all purpose flour
1/2 tsp vanilla extract
1/4 tsp salt
1 tbl lemon zest
4 tsp fresh lemon juice
1 tbl poppy seeds
  1. Cream the butter and sugar with an electric mixer until smooth and light in color.
  2. Add lemon juice, zest and, vanilla extract. Combine with mixer.
  3. Add the flour, salt, and poppy seeds. Mix until just combined and pebbly.
  4. Press together to form a dough disk.  Wrap and refrigerate until firm, a few hours or overnight
  5. Set oven to 350 F (mine got slightly browned on the bottom, if this bugs you then just set the oven between 300 and 325 F. Make sure to double the cooking time and keep a close eye on them if you do this)
  6. Roll the dough out between two sheets of parchment until you reach the desired thickness, mine were roughly between 1/4 and 1/2 inch.
  7. Return the dough to the fridge for 20 minutes to firm up.
  8. Cut the cooking in squares or with cookie cutters.
  9. Arrange on a parchment lined baking sheet, no more than one inch apart.
  10. Bake for 8-12 minutes. Keep an eye on them, the bottoms brown quickly.


If you feel like it, you can make some cute labels and share these cookies with friends. I've been thoroughly enjoying surprising people with baked goods, and super cute labels made it that much sweeter. I made these with cut up canvas paper and permanent markers (I love the Bic color assortment)


Now that I'm hooked, I can't stop thinking up lemon poppy seed recipes.

Pickling the Ramps


I wish I had a go-to pickling/brine recipe. Don't we all? No, not really? Weird.

As you may have noticed, I picked my fair share of ramps recently
and have since been attempting to cook them in just about every way possible.
Sauteed, blanched, and now...pickled.


I really am looking for a go-to, out of this world,
knock your socks off, I'm going to eat the whole jar-pickle brine,
so if anyone has one... please share!


This pickling recipe worked out pretty well but I prefer a bit less sweet. 


You may or may not know this about me, but I really fancy pickles. 
I'm usually a classic pickled cucumber fanatic but what the hell! ramps will do.


Again, I did find this just a wee bit too sweet for my liking, 
so I cut the sugar and honey down a bit for the typed up recipe.


Naturally I designed a cute little label for my jars. 
Yah, it's a damn precious jar, don't you think?

Oh jars, absolutely gorgeous glass containers. 
I'm truly in love with them. 
No icky plastic, and let's not kid ourselves, they have an undeniable look.
One glance and you just need some jars in your life.


Pickled or not. Ramps have been a fun addition to my spring produce bounty this year!

Matzoh Matzoh Matzoh


Once a year the matzoh (pronounced "mahhh-tzaahhh") saga starts up again. Some of us like egg matzoh (I find it somewhat soggy), others prefer the whole wheat variety, while I am a hardcore yehuda enthusiast.

If I'm eating matzoh, I'm eating Yehuda. Yes, you heard right. I actually have a matzoh preference. 


For those of you genuinely baffled by this word, let me give you the quick run down:
Matzoh is a flat cracker-like food that we (those who celebrate passover, namely Jewish people) eat once a year for 8 days to celebrate the holiday of Passover. It's a great holiday, we tell stories of the crazy days back in Egypt. I enjoy the story telling bit.
 If we're being honest, let me just tell you that I actually enjoy matzah. Yep, shmear it with some butter or mix it up with eggs for matzah brei and I'm enjoying a delicious meal. It's okay, you don't have to like it.


But I think you're going to like this incredible sweet matzah snack that I made with my cousin, Liza this weekend. At home, we call it Matzoh Roca, but I've heard it go by matzoh candy and a few other names as well. So whatever floats your boat!

First you make some caramel gold. It's rich, its entirely sugar and fat AND you totally want it on your matzoh.


Then you spread that goodness all over the bland and unassuming matzoh. It has no idea what's coming. It's actually sort of thrilled about that.


Chocolate is next, whatever variety you fancy. I happen to fancy white chocolate, apparently a lot of people don't. I get it, I used to hate it, but I really truly love the stuff now.

That little white chocolate section in the back was just for me. Score!


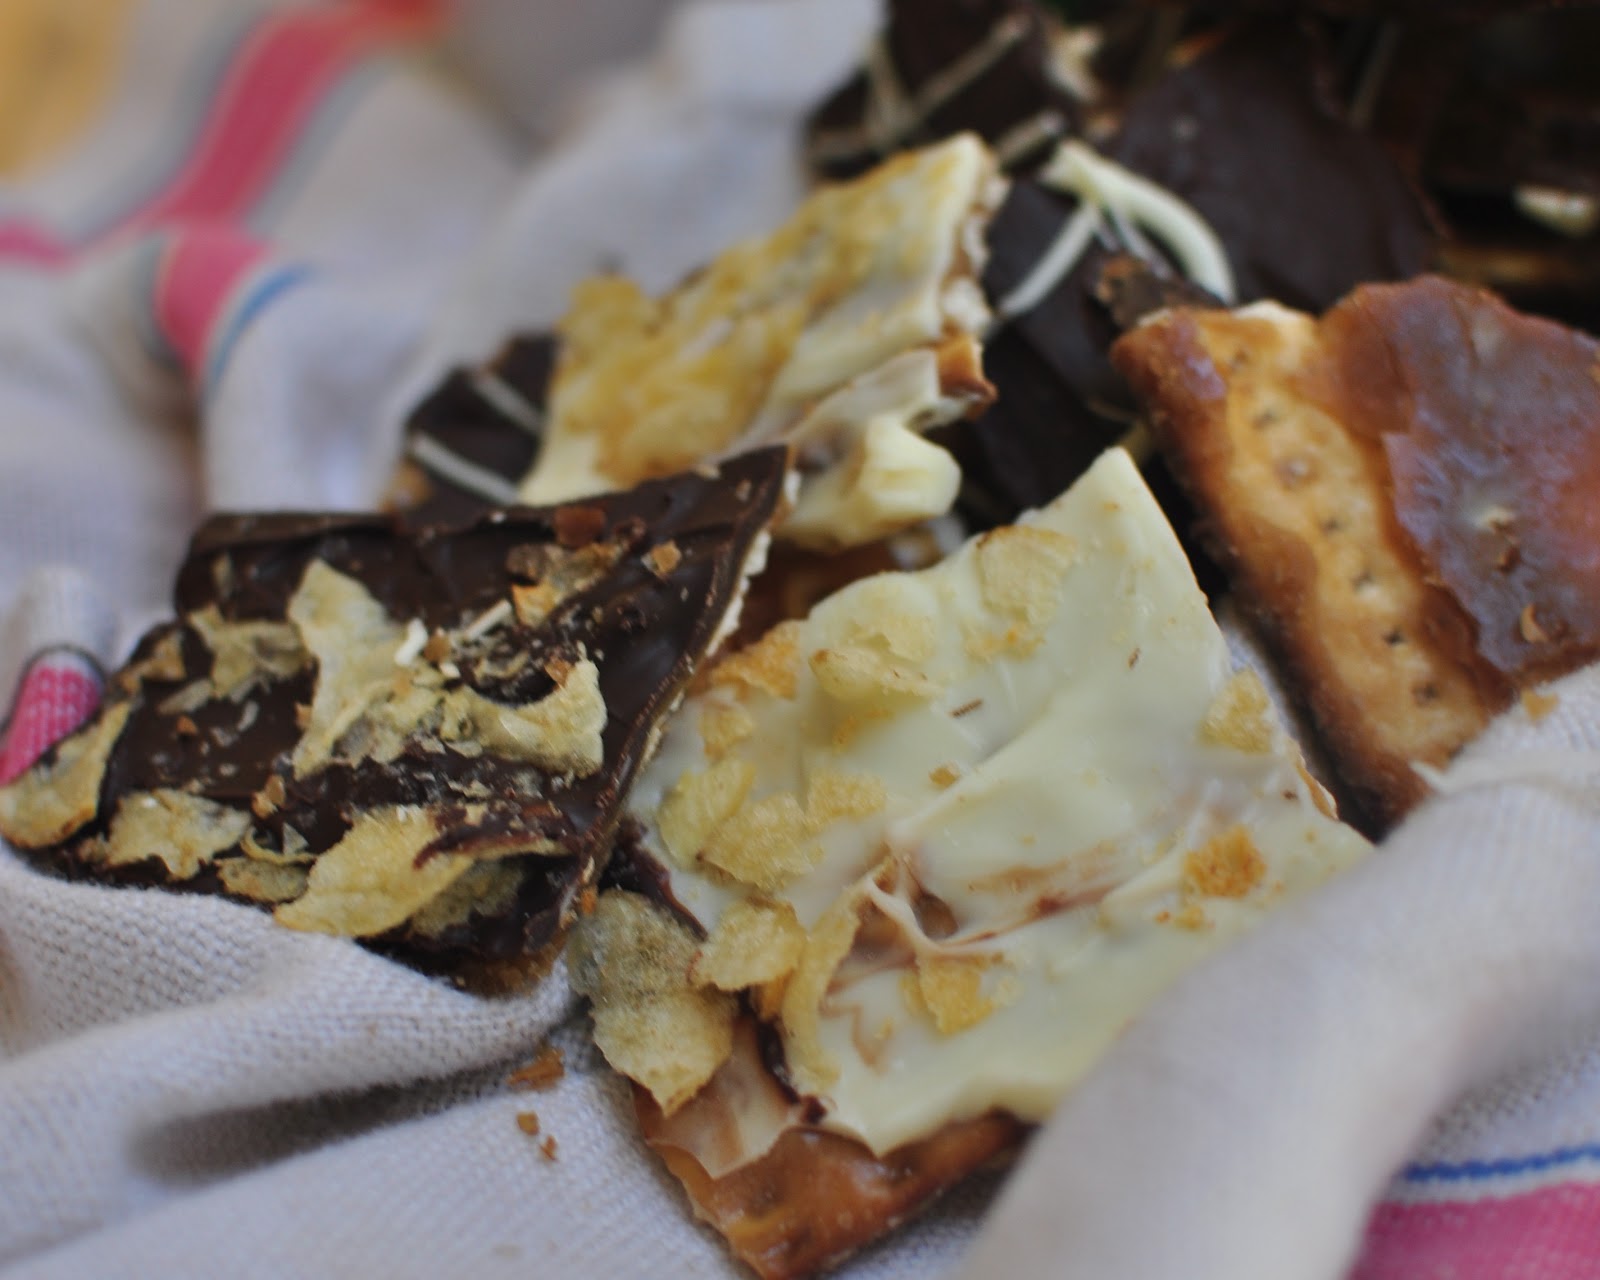
Sprinkle with whatever toppings you desire. Potato chips was a genius discovery for us this time around, we also went with a bit of coconut.

No toppings? drizzle some white/dark/milk chocolate all over that sugary mess.


Then the matzoh roca goes in to the fridge to harden up.

Final Step? Break it into a bunch of irresistable pieces, and keep it handy in the freezer. This stuff just tastes best when it's been kept frozen. I swear, it's not tooth-breakingly hard. It's nearly perfect.


 yum yum yum yum


Recipe anyone?


Sidenote: this recipe can also be done with saltine crackers, and would probably be good with lots of other kinds of crackers too!


LinkWithin

Related Posts Plugin for WordPress, Blogger...